Quick Start
If you are using the Managed Environment, you could skip the next paragraph about Super organisation.
When VidCheck is installed and started for the first time, it automatically creates a Super organisation which has admin permissions to manage the entire VidCheck instance. Name of the organisation is managed by the env variable: SUPER_ORGANISATION_TITLE and if you haven't changed the env file as mentioned in the installation guide, the super organisation created will have the name: VidCheck Administration.
Also, a super organisation is only created during the startup if the value CREATE_SUPER_ORGANISATION is set to true. The startup process will skip creating a super organisation, if the value is set to false or if an organisation with the name exists already.
Step 1: Create Space#
Space is a concept that is consistent with other applications developed at Factly Labs. Following are a few basic concepts that you would want to know about spaces before getting started.
- Each organisation can have multiple spaces.
- Every website needs at least one space.
- Users within an organisation are managed in Kavach. User access to entities within a space is managed through policies.
VidCheck supports creating multiple spaces within an organisation that can be managed through the Spaces menu item. To begin using the VidCheck, you need to create your first space within an organisation.The fields are self-explanatory but you can check claimant section for more details.
Step 2: Create Ratings#
Once the Space is created, the user then needs to create Ratings for that space from the Ratings menu item. Different organisations have a different rating mechanisms and you can read more about here. The ratings added here will be available when fact-checking the videos. If you are not sure on what rating system to follow, you can click on Create Default Ratings that creates default ratings as defined in VidCheck.
The default ratings created would be:
- False
- Misleading
- Unverified
- Partly True
- True
Step 3: Create Claimants#
Every Fact Check will have a claimant. So, lets add a claimant from the claimant menu. The fields are self-explanatory but you can check claimant section for more details.
Step 4: Create Fact Checks#
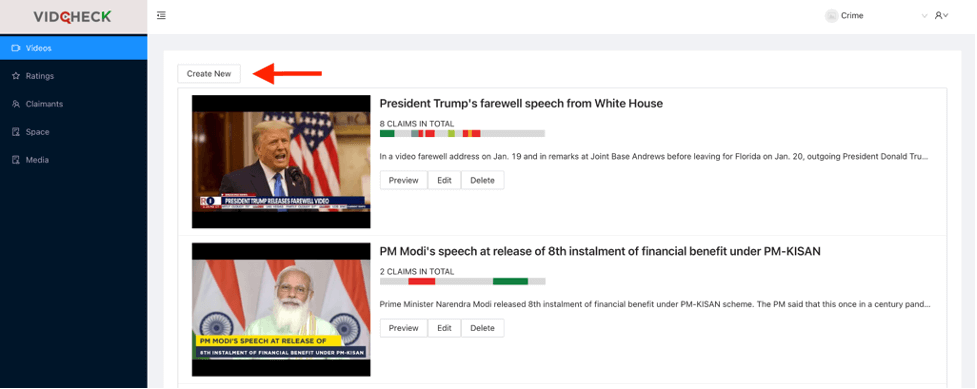
You can start creating your first Video Fact Check by clicking on Create New button from the Fact Checks menu.
Create New Fact Check#
- Navigate to the Fact Check Menu
- Click on
Create Newbutton to getting started with creating a new video fact check
